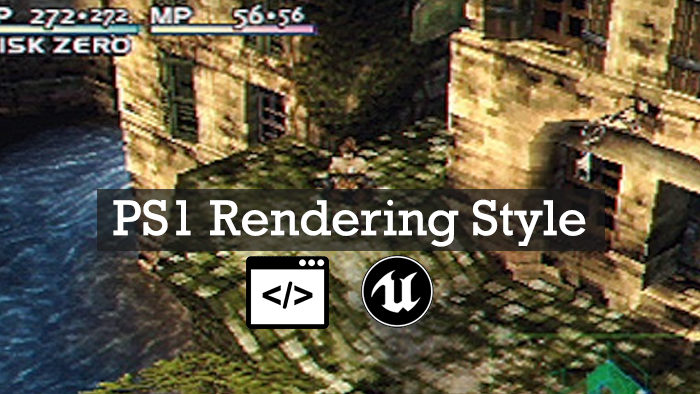
Mimic the Nostalgic PSX Rendering Style in UE4
Introduction
In the past, PSX games exhibited a shaky and wobbly vertex effect, an unintended consequence of the absence of floating-point precision.
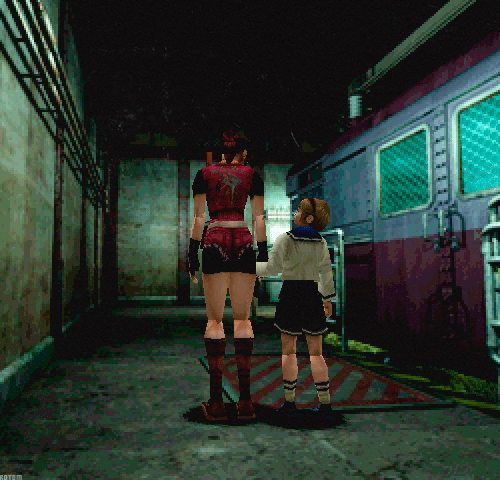
The PSX’s hardware only allow fixed point calculation so when the camera is moving or an object is moving, any given vertex stays in its position until it’s close to the next position and suddenly snap to it, nowadays graphics hardware can interpolate vertices between two positions smoothly thanks to more floating-point precision that is available.
We assume you have already created a clean project ready to test the shader or you already have a project that you want to change its graphic style. At the very least, you should have a mesh with a material applied to it.
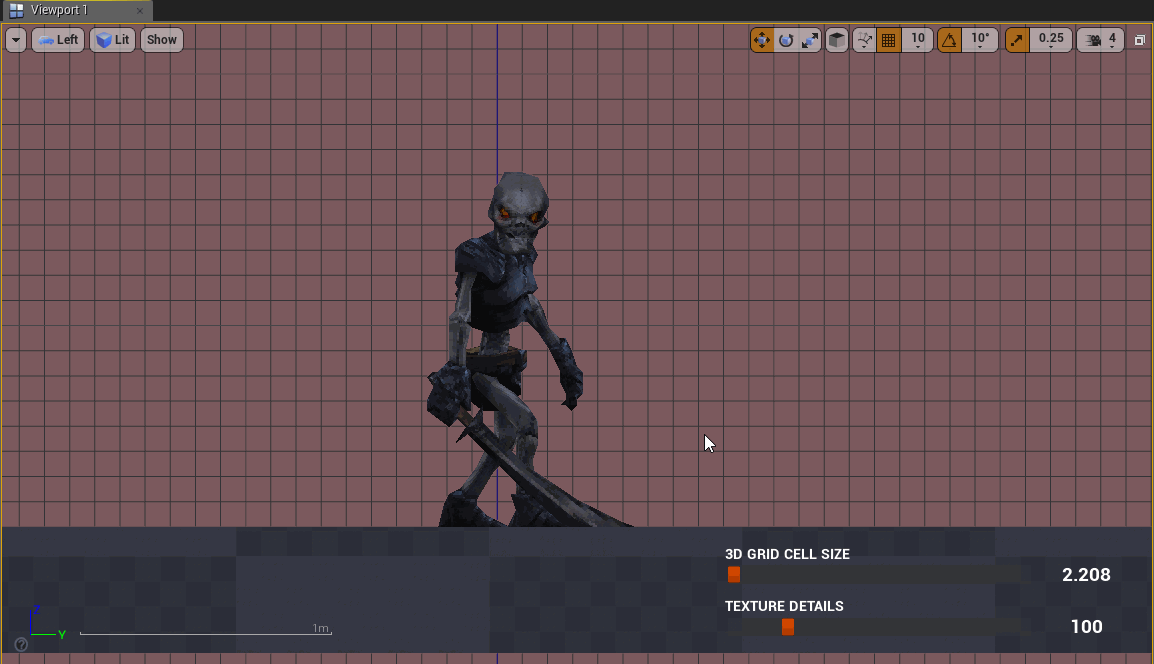
Preview
You can download the complete project at the end of this tutorial so you can check it at your own pace, you will find everything documented.
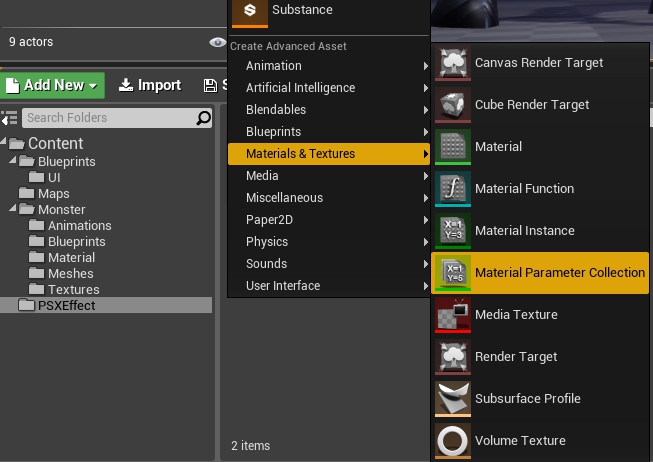
Step 1: Create a material parameter collections
Material parameter collections is an asset that store global parameters (a set of scalar and vector parameters) that you can reference in any material. For example wind direction and strength can be referenced by all foliage’s materials. To read more, check this link.
To create a new material parameter collections asset, in content browser right click and go to Materials & Textures > Material Parameter Collection.
Next add two scalar parameters, Global_PSXEffect_3dGridCellSize & Global_PSXEffect_PixelizationAmount
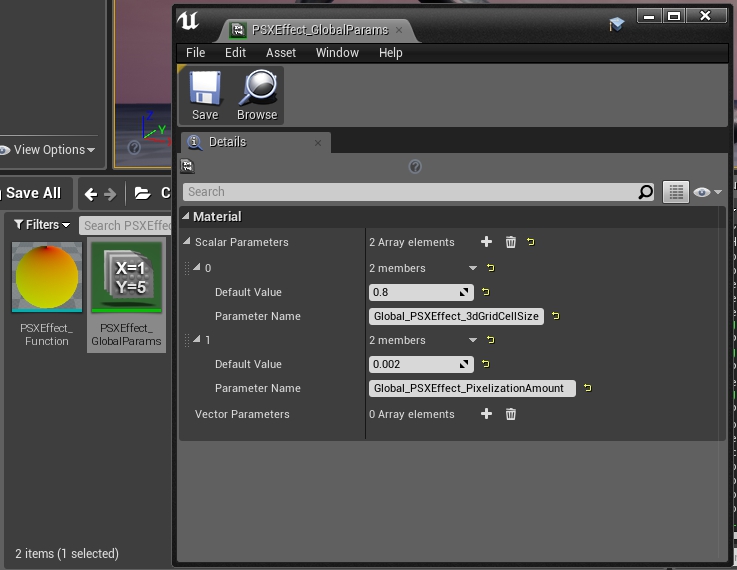
Hit save and close the window.
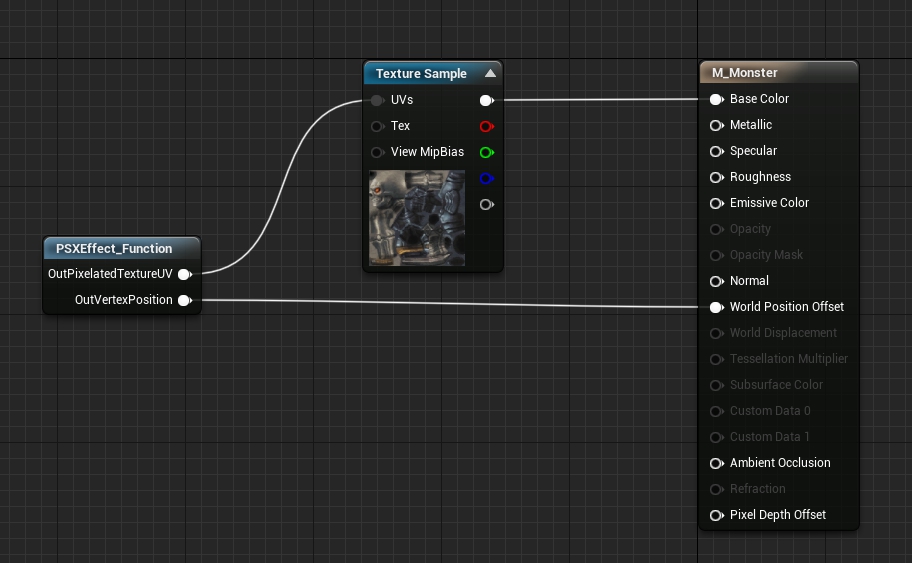
Step 2: Create material function
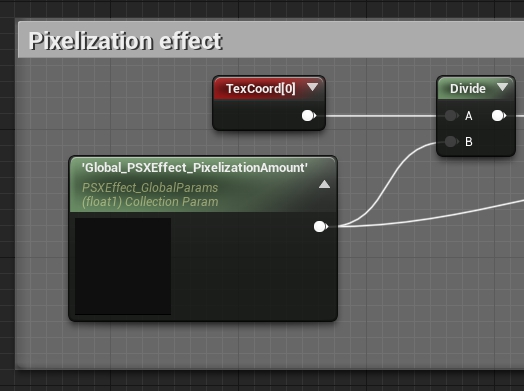
The function PSXEffect_Function returns a vertex offset data; we use it to offset vertices to get the shaky effect. The function also pixelates UV data, we plug the return value in Texture Sample node to have a pixelated texture.
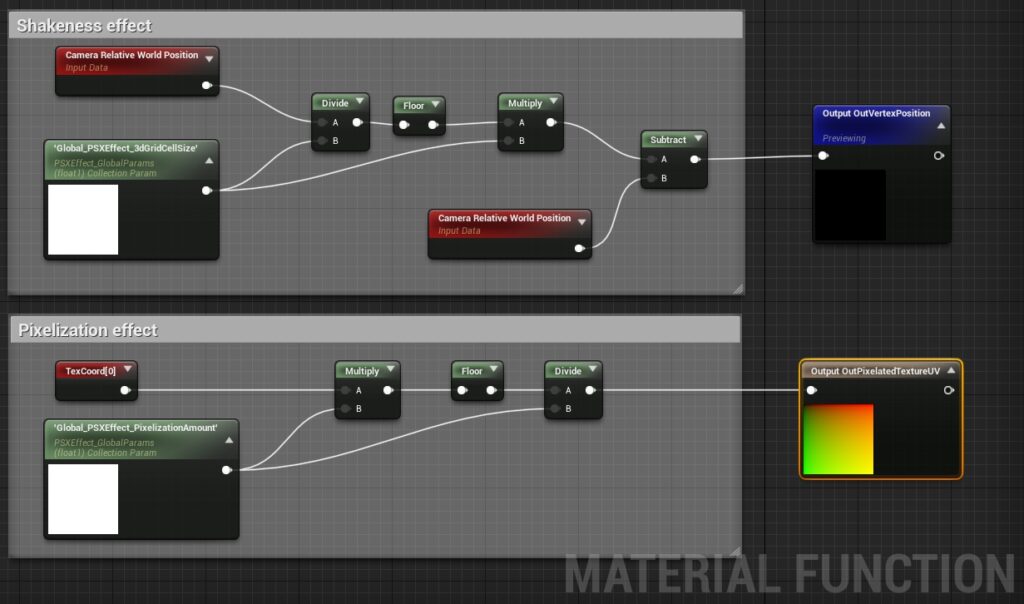
Notice that we used the parameters we created previously in material parameter collections.
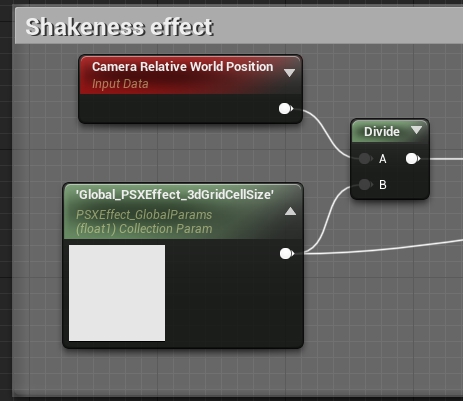
To understand how we shake the vertices, imagine a 3D grid around your mesh, and vertices snaps the closest points in that grid.
Step 3: Add PSXEffect_Function to you materials
It’s easy to add a function to a material. You can add it by left click in the material editor and type the name of the function.
Source File
That’s all folks! Thanks for reading. If you have any questions, drop a comment here or join me on Discord.
I always thought the vertex snapping gave more personality and life to models on the PS1. 🙂 Except if they were cars in Destruction Derby 1 and 2.
Also it’s nostalgic for most gamers born in 80’s.
I have a problem with the function amount output is it possible to create a video tutorial for this?
okay i just typed in a wrong number it´s working now thx
Glad you solved it 😉
If you need any help just ask.
Thank you.
should i be using a certain version of Unreal? A lot of the boxes in material function when setting it up don’t exist or wont come up as a type it
Normally they should come up when you type. What is your ue4 version you use ?
Me and my friend are using this rendering style for our nonprofit game. How can we credit you for the scripts (:
-Logan
Hello,
I am glad you found this effect useful for you game.
For credits, you can add my name in your credits, but you are free not to do that if you want. One thing, please send me your game at mourad.bakhali@gmail.com.
Good luck 😉
Hey, awesome work with the shader! I’m just wondering if there is a way to apply this to the whole screen using post-process instead of specific materials/meshes? I have the pixelization working on the screen by using a post-process however I’m trying to add the shakiness but I get float value errors. Any ideas?
Hi Rykane,
Thanks for passing by.
I don’t think you can achieve the same effect using just post-process effects, you have to manipulate vertices !
I must have missed something but I cant find the camera relative world position node, any help with that ?
Hi Jean. Choose “World Position” node and set “Camera relative world position” in the parameters of the node. Hope this helped you.
Thanks Argemon for correcting me.
Hi, im having some problems. Im currently on 4.25 and im very newbie at the engine.
First of all, in the Material Function i cant find “Camera Relative World Position” node, only the “Camera Position”
Also the effects doesnt work and the texture of my character material dissapears and it becomes white
Thank you for the tutorial anyways!
You are welcome Ismael. For your question choose “Camera Position” and set “Relative World Position” in the parameters of the node 😉
do I have to manually add this to each material? Is there a way to do it via post process or something that applies to everything
Hi Antonio, as far as I know there is no way to change vertex position in a postprocess material. You have to place the function that manipulate vertex positions in each material.
Good guide, but 1 thing to change is that you don’t use “Camera Position” node (which doesn’t have any parameters), but rather “WorldPosition” node and choose third option in the details (Camera Relative Position Inlcuding Shader Offset).
It’s actually “World Position”, not “Camera Position”
Hello, HUGE SHOUTOUT to Mourad, 5 years later and this tutorial STILL works amazing. For anyone who has trouble with the material creation, a few things have changed in UE5.4+ . When inputting parameters from the collection into the material function, the color shown will be red instead of white. Also, the grid size of .8 and the pixelization value of .002 might be too small, I had to increase the grid size to 9 to see anything noticeable, but of course it’s case by case. The creator of this is a GENIUS.